I don’t often write about blogging or the technical aspects that come along with it, however, I’ve been receiving a lot of questions lately from our readers regarding “how to start a blog”.
I hope my first-hand experience in starting and running a successful blog will help teach you my very own tried-and-true methods. I will walk you through, step-by-step, how to easily and quickly set up a Wordpress blog using Bluehost (one of the best hosts for starting out), and how to drive traffic to your blog and even make some money over time.
As I take you through the process of setting up your blog, I will also provide you with answers to specific questions that you may have (ones that I’ve had to find answers to when setting up my own blog).
Let’s dig into this…and please note that some links in this post are referral links, which means I may get a small commission from your purchase. You won’t pay anymore and in some cases, get a special discount by using the links!
How to Set Up Your Wordpress Website on Bluehost
STEPS:
- Choose Hosting Service
- Set up hosting + Registering Domain
- Set up blogging platform
- Get your blog ready (design + plugins + posts)
- Monetization
- Growth Plan
NOTE: this is a quick blog set up! Steps 1-3 shouldn’t take more than 10 minutes**
STEP 1. CHOOSING A WEB HOST
You might be wondering, what is a web host?
A web host puts your website on the Internet so everyone can see it. That’s where everything for your site is saved and stored.
Which web host do I recommend for anyone getting started?
For simplicity, cost, and ease of getting started; Bluehost.
Why do I prefer Bluehost? Here are the many reasons why I give Bluehost a 10/10:
• It’s easy to use! Literally, anyone can get a blog up and running within 15 minutes using Bluehost. The steps outlined in the article will show you how.
• You can’t beat the price. You can have your blog sorted for as little as $2.75 per month (by using my link). Although I am a Bluehost affiliate partner, which means I receive a commission for referring new customers, I’d recommend using Bluehost regardless and I used them when I first began this blog. I only affiliate with companies that I truly believe in.
• 24/7 customer support. Bluehost’s customer support is the definition of unparalleled. If you don’t believe it, just go to their site and find their support chat and ask some questions. Watch how quickly you get the answers you need.
• You get a free domain! When you sign up for hosting, Bluehost will give you a free domain name, which allows you to forgo the upfront and recurring fees that come with buying a domain on your own. If you already have a domain name, no worries, you can use your domain with Bluehost (it’s just one extra step) – More on the free domain below.
• Wordpress (blogging platform) through Bluehost is free. The One-click installer makes things super simple.
• 30-day Money-back Guarantee! Don’t sweat it; if things don’t go well, you can always get your money back.
• Reliability. Bluehost’s data centers are top-notch. They have massive facilities and they build their own servers. Their headquarters has a custom-designed 20,000-square-foot data center, they have over 50,000 square feet of office space, and enough backup generators to power an entire city. Besides their US-based data-centers, they also have data-centers across the globe – UK, India, and China – to shorten the distance between target users and servers.
• Free SSL certificate. This is used to add an extra layer of security to your website (it’s also something Google and other search engines are prioritizing in 2018).
Overall, it’s cost-effective, reliable for you and your users, and super simple to go from A to B. You can have a professional blog (with the intention to make money, or not) set up in under 15 minutes!
STEP 2. SET UP HOSTING + REGISTERING DOMAIN
Setting up a Wordpress site via Bluehost is surprisingly easy.
I’ll show you, step-by-step, how to start your blog now.
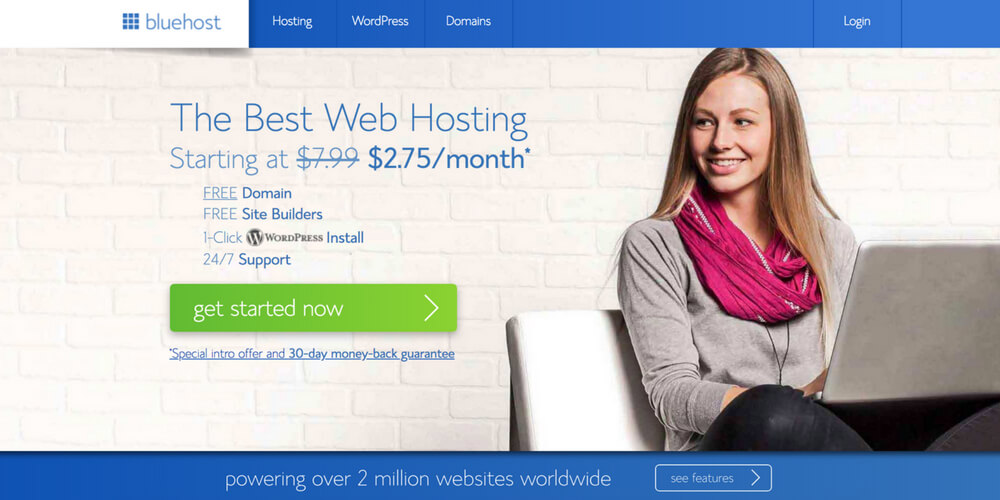
To get started, go to Bluehost (use this link for my affiliate discount) and click “Get Started Now”
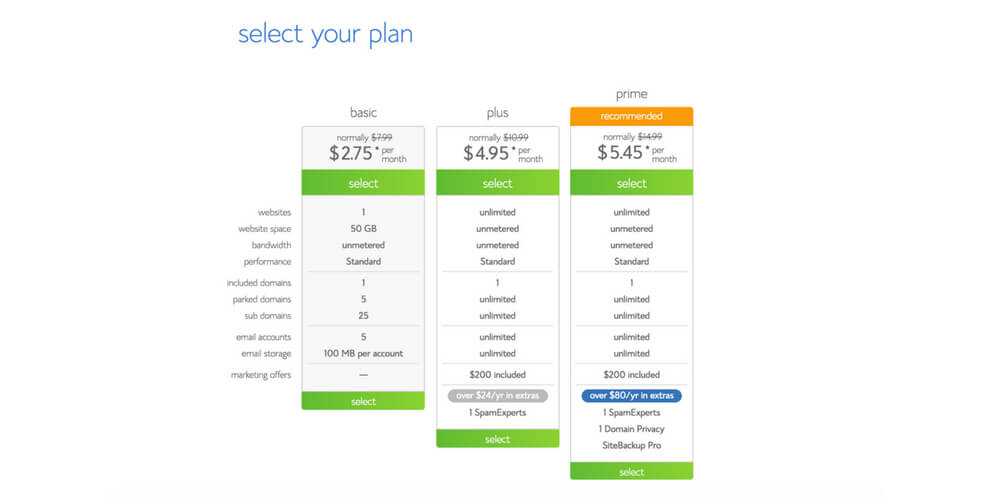
Bluehost provides different tiered plans depending on your needs. When starting out, just go for the lowest priced package, which is called “Basic”. The basic package is currently $3.95 per month ($2.75 using our link!). Now, select “Basic”.
Note:
– All plans include a FREE Domain.
– The basic plan is really all you need for now, and you can always upgrade at any time.
Best practices for choosing a domain name:
• Go branded name over a keyword friendly name as it doesn’t matter for SEO like it use to.
• Avoid any tricky spellings, underscores or any symbols.
• Try to keep it as short as possible
• Always go .com (there are some exceptions)
• Keep it simple and concise, don’t over think this!
A good tool for choosing a domain name:
I like to use leandomainsearch.com; enter a word that you want your domain name to include and see what’s available!
A few quick points to note regarding the free domain:
– If you cancel your account within 30 days from the signup date, you will get a full refund of the hosting account costs but they will deduct the money for domain registration because it is not possible to cancel the domain name. However, you can use that domain name for 1 year and from there you can either transfer it to any 3rd party register, like Google Domains, or keep it with Bluehost at $15.99/year.
– If you cancel your Bluehost account at any time after 30 days, the same options apply for your domain; you just won’t get your refund for the hosting.
Already have a domain name?
No worries, type it into the box on the right. After you complete your sign up, all you have to do is change the DNS in your domain registrar (Google Domains or Godaddy, etc.) to ns1.bluehost.com and ns2.bluehost.com.
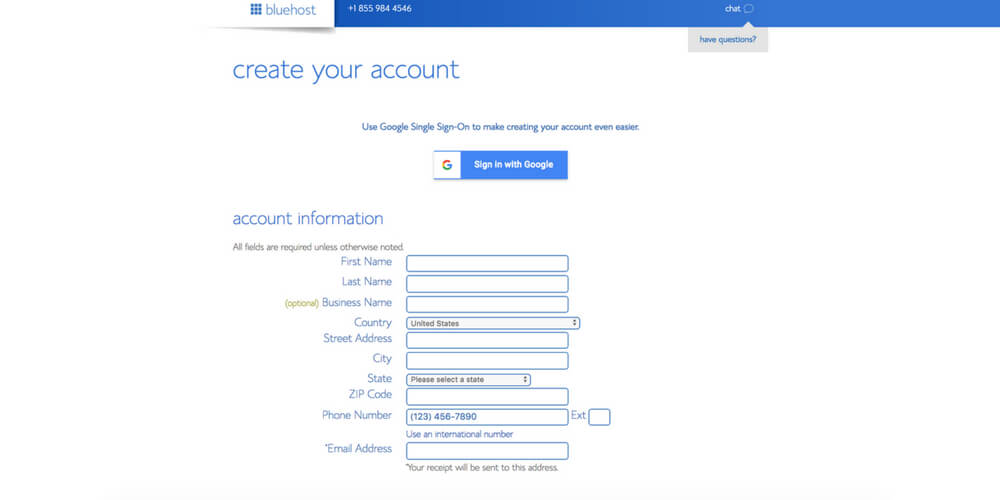
Next, fill in your personal details in order to create your account. Your personal information is absolutely safe and secure. Bluehost won’t spam you or sell any of your information either.
Then below that choose the package details you want.
Note:
– The longer you account plan you choose, the greater your savings will be.
– If you are signing up for a 36-month plan, the price is $2.75 per month; 24-month plan, the price is $3.95 per month; 12-month plan, the price is $4.95 per month
– Don’t go month-by-month; that way you won’t have to deal with an expired website after each month. For example, if hosting is not renewed or if the card expires, then your website will be down and you risk losing visitors/loyal readers.
– All the plans come with a FREE domain.
– I suggest selecting the Domain Privacy Protection. This hides your personal information from anyone who might search for it. This is important for your privacy and safety. You do not need the other add-ons that Bluehost sells, so I suggest unchecking any of the extras that are listed.
Here’s what the other add-ons provide:
– Site Backup Pro: This gives you extra security for your website. Although WordPress is very secure, this extra feature allows you to backup your site regularly. If you think you’ll use this feature, it’s could be worth the extra $2.99 per month or $35.88 per year.
– Search Engine Jumpstart: Bluehost claims that this tool can help you in search engine rankings. This feature is also $2.99 per month or $35.88 per year.
– SiteLock Security: This add-on verifies your email address, physical address, and phone number. If you plan to sell a product or service on your site, this feature might be helpful for proving your credibility to customers. This service is an extra $1.99 per month or $23.88 per year.
You can always purchase these add-ons in the future.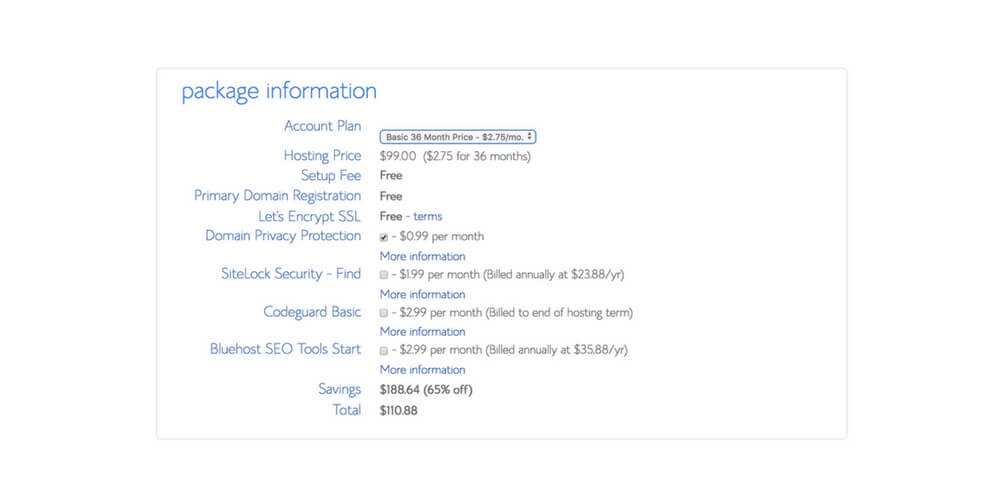
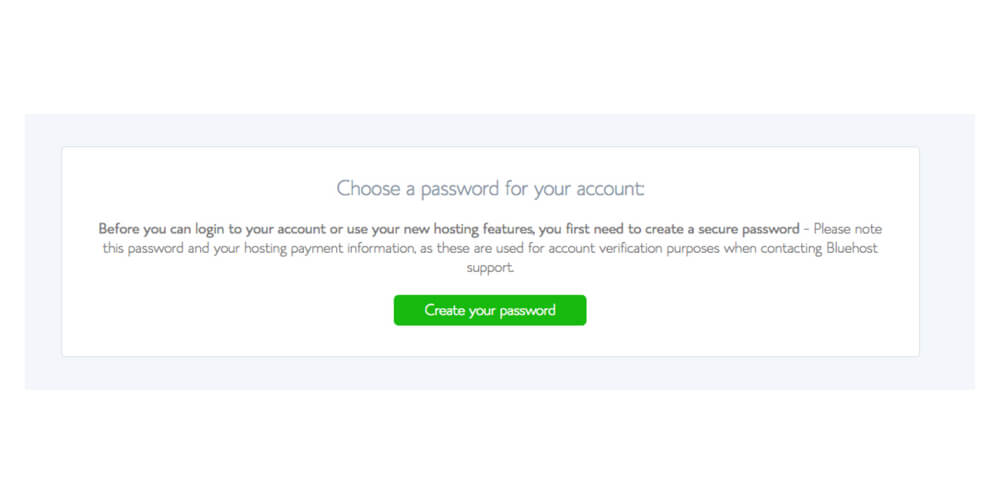
Lastly, you will create your password and then log in into Bluehost using the password you selected.
STEP 3. SET UP YOUR BLOGGING PLATFORM (WORDPRESS)
Bluehost has optimized the installing of Wordpress. With the one-click-installer (also, FREE) you can install a new theme and Wordpress with, well, one click! This is one of the best features of Bluehost in my opinion.
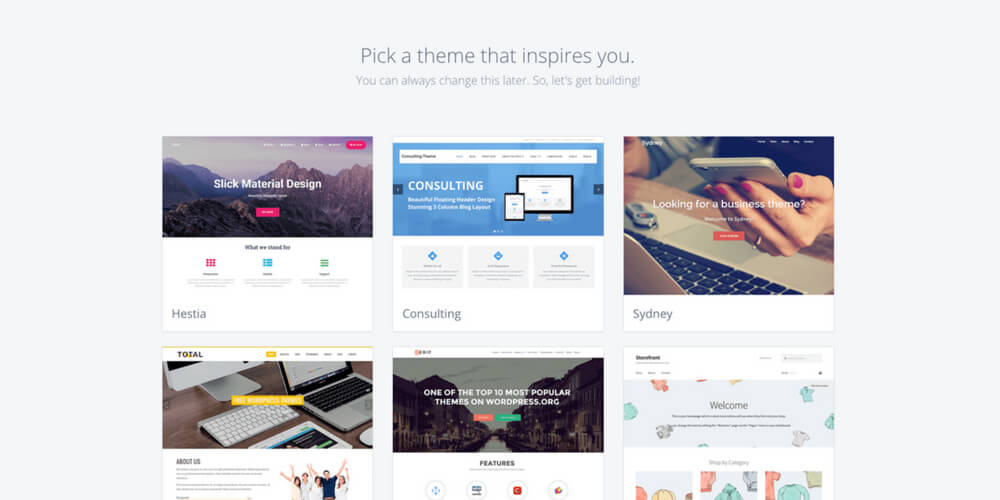
Pick your theme, and don’t worry, you can easily change themes at any point from your WordPress Dashboard.
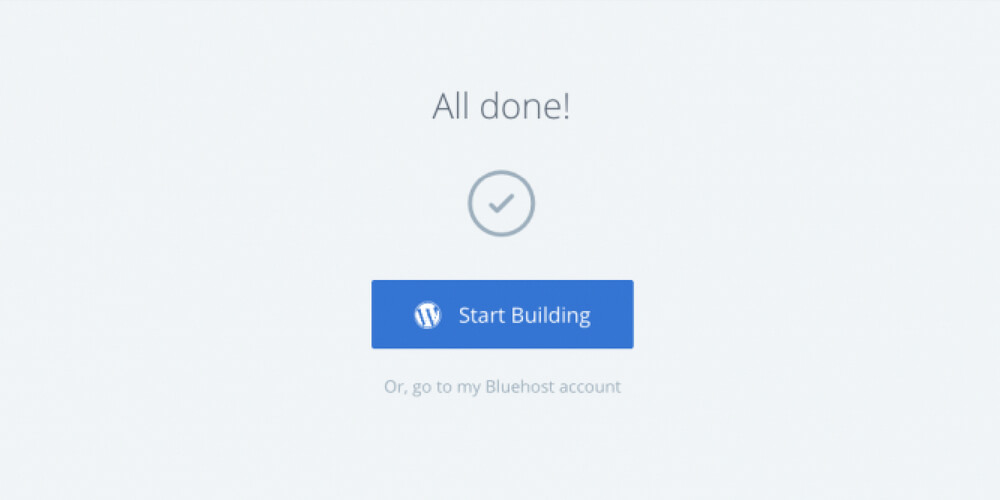
When you have selected a theme, you will be taken to an “all done” page.
Click on the blue ‘Start Building’ button to be directed immediately to WordPress. This is where you will start building your site.
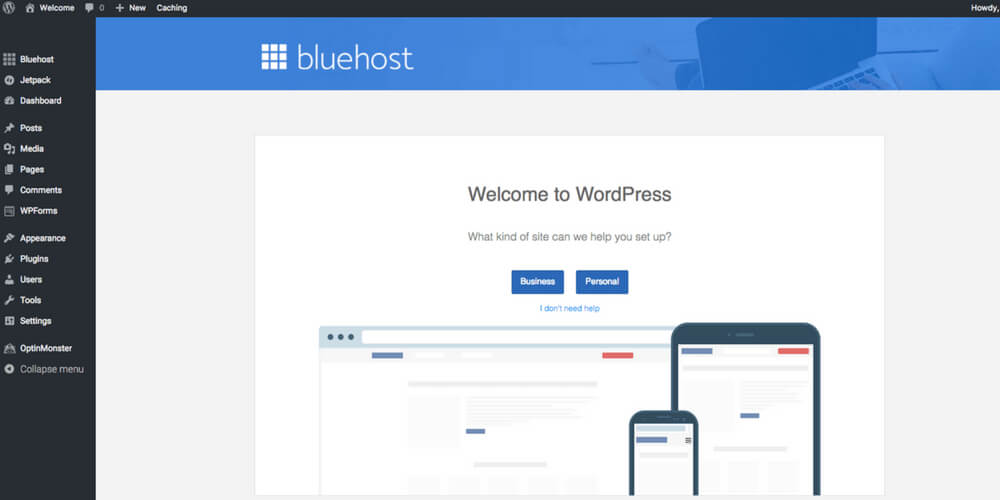
This is when you are given the option to select the kind of website you are building. A business site is used if you are building a website where you will take payments, sell a product (physical or digital), and/or advertising. If you are simply starting a blog and you aren’t sure yet if you want to make it a business, you can choose “personal”. Even with a personal blog, you can monetize it to make money, so don’t worry about this too much. Also, you can always change the function(s) of your site as you move forward with growing your site (i.e. if you decide to sell an e-book in the future, you can always add the functions/plug-ins that are necessary for taking payment and automating the delivery of the digital product).
Follow all the prompts to install WordPress.
BOOM, now your website is ready to go.
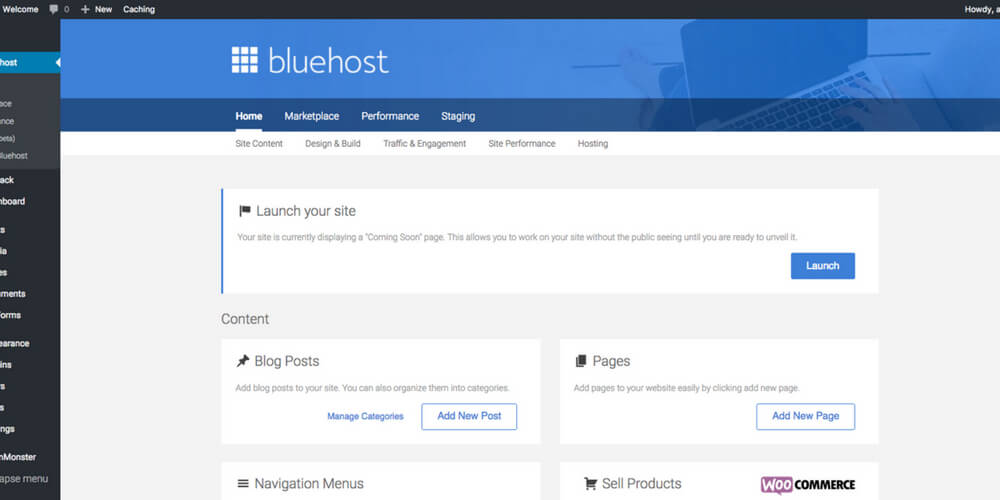
Your site will start with a Coming Soon message before you “Launch” it.
STEP 4. GET YOUR BLOG READY (DESIGN + PLUG-INS + POSTS)
Now you can change your theme (remember, you can also do this at any time, even after “launching” your site), install a logo, choose your colors for your site (branding is essential), set up the pages you want, and add any blog posts that you already have before it is live (if you want you can even start with just one blog post!).
Best design practices:
- Keep it clean: The minimalistic look is always better on the eyes.
- Responsive is key: Make sure it looks good on your PC or Mac AND your phone (most themes are responsive, but just make sure to double check on that).
- Choose the right font, and keep it consistent!
- Choose the right colors, and keep it consistent. If you have 3 colors for your brand, only use those 3 colors. i.e. if your brand/website is going to be black, white and gold, make sure your links are gold – don’t choose a blue or red link!
- Keep up with current trends. This will be easy, just choose a recent theme (paid or free).
OUR MUST HAVE PLUG-INS:
– WPForms: This is a contact form – make sure your users can contact you!
– Monster Insights: This is a Google Analytics plugin. It is essential to monitor your traffic.
– Sucuri: Protect your site
– Backup Buddy: There’s no better security than having a reliable backup system.
– YOAST SEO: Best plugin for search engine optimization. It will give you all the tips you need when creating posts/pages to make sure your page is optimized for search engine results
– W3 Total Cache: W3 Total Cache allows you to serve compressed and cached files to your visitors. Speed is one a very important factor for SEO. Faster websites rank higher in Google, this means more visitors for your business website and more conversions. It also helps with providing user experience.
– Sumo: Make sure you are collecting the emails of those who are leaving your site! Sumo will allow you to create a pop-up for those who are abandoning your site. You can make an enticing offer to sign up to your newsletter.
– Mailchimp or Constant Contact: This goes hand-in-hand with Sumo, after you collect emails, you need to make sure you are emailing them on a consistent basis (make sure it’s interesting!).
Note:
Certain plug-ins can slow down your websites speed, so make sure you monitor your webpage speed (if adding any plug-ins not recommended above) to keep that in check. You can check your webpage speed, before and after adding a plug-in to see how it has affected your webpage’s speed.
Now, add as many posts as you can but don’t worry so much, as long as you stay consistent with posting moving forward, you are all set.
When you are happy with how everything looks, just hit the “Launch” button.
Be sure to follow all the prompts, which will include your site name and description.
From here you can log into your Bluehost CPanel to access your Wordpress site. If you need any help making changes, all you have to do is ask Bluehost for help.
After your site is up, the quickest way to access Wordpress is by going to the admin login URL (yoursite.com/wp-admin).
Enter your username and password, and then click “Log In”. You will be taken to your Wordpress dashboard. Your Wordpress dashboard is where you will control everything for your website, such as creating pages, writing posts, and changing the appearance (as I mentioned, you can always change your theme – you will not lose any of your content/pages/posts if you change your theme).
That’s it! You are officially a blog owner!
How long did that take?
I just tested the above steps and I accomplished it all in 10 minutes. The only part that may take a bit of time is choosing a domain name that’s available, but if you have that figured out, it shouldn’t take any longer for you than it did for me if you follow the steps above.
What’s next?
Follow these two steps to make sure you are on track to generate revenue and increase traffic.
STEP 5. MONETIZATION
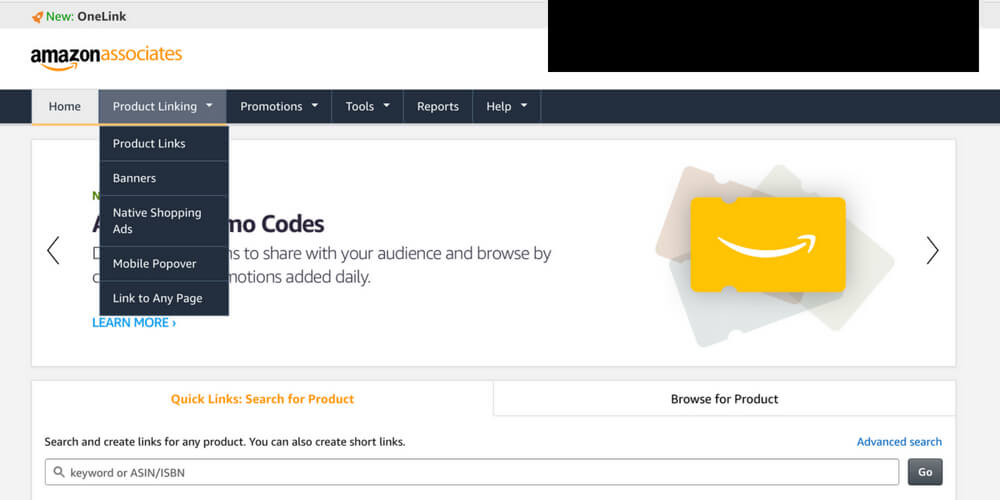
Sign up for an Amazon Associates account.
Once you have access, you will see a “Product Linking” tab, from here you can create “Product Links” (trackable URLs that will take readers to the product you choose on Amazon), “Native Shopping Ads” (seamlessly integrate highly relevant recommendations in a responsive ad unit), “Mobile Popover” (enhances links on mobile by showing a small pop up at the bottom of the screen when a user scrolls past the link within the article), “Link to Any Page” (build links to pages on Amazon including popular pages, as well as letting you link to the results of your own Amazon search).
Note: you are going to need a lot of traffic and/or very targeted traffic and a good strategy for this to be a good source of revenue.
2. Offer a coaching service
If reading your blog articles teaches your audience something, they likely will want to learn more from you. They might want to practice the skills with you to see substantial improvement and to really know how to execute on your methods. Training with you, the expert, will guide them toward success faster than anything else
3. Products (physical or digital)
If you are receiving a lot of traffic for a specific product that you talk about or idea/method, consider purchasing that product and offering it on your site or developing an in-depth e-guide into the idea/method. Ebooks have seen a massive growth in demand and people are willing to pay.
Physical products: If your readers love your brand, they will purchase things like shirts, hats, etc. if you have nice designs. They have apps you can use for this and you won’t ever have to touch a product, you just need to make some designs and they can purchase it from your site (1 MOQ). You won’t make as much as if you produced and shipped the gear yourself, but if you see a certain style selling A LOT, and fast, then it might be worth bringing that in-house by producing the product yourself in bulk.
4. Market your freelance writing skills
You can reach out to potential clients and show them that you know how to write compelling content. Use site’s like Upwork or use your own contacts and show them metrics from your blog. Clients will know that if you can write successful pieces for yourself, you can also do it for them.
5. Offer sponsored content opportunities for other brands.
If you have a decent amount of traffic and your own audience (which, of course, you will), you can reach out to relevant brands (and brands will likely reach out to you too when you are big enough) to post sponsored content for them. The content you can provide for them on your own platform will expose them to a new audience, which is relevant to their brand and could lead to sales for them and new viewership.
You get paid and they get access to a new audience – it’s a win-win.
Google Adsense is a program run by Google which uses internet search technology for ad placement on websites relevant to the content of the website. The owner of the website (or blog) receives a varying cost per click (CPC) depending on the amount that the advertiser is willing to pay.
If you want to monetize your website with Google Adsense, be aware that it does affect user experience so you want to make sure it’s as unintrusive as possible.
If you can find the right balance for a good user experience, this can be a great way to produce extra income because the ads are actually relevant to the content in your blog so your readers should naturally find interest in them and not be bothered. Basically, you just don’t want too many ads all over your site so that it affects the functionality and ease of reading. I’m sure you’ve been on sites where there are too many ads and you leave the site immediately because of it; Even if it’s relevant and the content is great, you won’t stick around.
Note: if not accepted by Google Adsense (they have some requirements), you can try AdsOptimal, Amazon Display Ads, or Infolinks. Also, to make a lot of revenue from this method, you will need a substantial amount of traffic
STEP 6. GROWTH PLAN
When choosing which articles to write, if your intention is to have a personal blog that is just for fun, you don’t need to put much thought into this and you might just get lucky and find yourself with a large audience one day. However, if your goal is to drive traffic, you need to approach each article and the growth of your website systematically.
1. Tactics for ranking your articles high in search engines and driving traffic:
Tools vs Truly Understanding SEO
There are many tools you can use to measure high-ranking keywords and rank-ability. However, keywords aren’t the most important aspect of SEO in my opinion. User intent (knowing what people are searching for and how they are asking their questions) is. Also, quality backlinks are essential.
User intent
As for researching user intent, it depends on the industry and market. For example, for e-commerce, I’d look at reviews from competitors’ products to see what people are asking or talking about in their reviews, or questions on Amazon that people have, etc. Then I’d check search engines to see how difficult it would be to rank for those questions, and if I could write a better article than say the top 5 positions. I’d also check on the search volume for certain keywords in that user intent and see the growth of that as well over the last 2 to 3 years. For many sites, it can also be advantageous to look at relative forums to see what students are asking, and then the same methodology for checking search engines for rank-ability/search volume applies.
Search Volume
Search volume: I look for terms that are growing in search volume, by looking at year over year growth of the keyword, rather than just the keyword’s current search volume. This has worked wonders for my blog on SET FOR SET.
Competitive Keywords
It’s not all about competitive keywords. Plugging in multiple long-tail keywords can add up to similar search volume/traffic as short-tail competitive keywords.
1. Structuring Articles For Product Sales:
I structure blog posts to meet the user at different points in their search/buyer journey (awareness, consideration, decision, loyalty/retention). In awareness, I wouldn’t sell them on anything – I’d make the blog article all about learning, to show that you are the authority in that topic. I’d move into the selling and converting stage during the decision phase, for example. I’d structure the articles so that I drive the traffic from one point in the buyer stage to the next. Conversion is always the goal, but it requires a funnel to be done correctly.
2. Guest blogging
Guest blogging is when you write an article, which is posted on another relevant blog. Basically, you reach out to bloggers who you think would appreciate a well-written piece and ask that they link back to your site (this is done subtly within the text of the article). This is beneficial for two reasons. Firstly, you get to reach a new audience who may like what you wrote about, leading them to be part of your audience from there on out. Secondly, you get backlinks to your site, which is very beneficial for SEO (albeit, it must be a good site with authority, not a spammy site with no traffic).
3. Repurpose content for YouTube & Social Media
Ideas for repurposing blog articles: make a slideshow for Linkedin, make a short version of it for social, reformat it for a relevant forum, use snippets for Twitter, create a video talking about the same topic, etc.
The purpose of this is to reach an audience who likes to consume content in different ways. Some people prefer to watch Youtube videos, some get all their information from FB or other social medias like Pinterest…or Linkedin, and so on.
4. Be active on social
Check out what I do on Instagram here. Share your content on the social media channels. Don’t stretch yourself too thin, but choose one or two social channels that make sense for you and that you will want to be active on. You can end up driving a lot of traffic to your blog by being active on social.
5. Connect with other bloggers
Be active on forums where other bloggers discuss thing. Like this post about “Favorite Tricks I’ve Learned from Bloggers”. Learn, learn, learn. Pick their brains and try new tactics to grow your blog. They will probably also be happy to make collaboration like a guest post at some point too!
6. Be active (not spammy) on relevant forums
This point is different than repurposing your content on forums, although they go hand-in-hand, as the more active you are on in the comment section on forums, the more people will accept your posts (i.e. they won’t take it as spam). Don’t always link to your site. Write good, helpful comments and if there is an opportunity to link to a blog article you wrote, do it! People on forums will see when it’s natural and when it’s spam… very quickly.
7. Create a newsletter and sign-ups for visitors who come to your site.
Use MailChimp to keep visitors coming back by emailing them with high-quality information and updates. If they give you their email by signing up, then you know they are interested in what you have to say. Email is one of the best channels to keep your audience close. If you are in their inbox, they definitely like what you do.
8. Be consistent with your posts.
Regarding your posting schedule and staying consistent, it’s really important for SEO that you are posting on a fairly regular basis – i.e. 5 times a week or 2 times a week, or once a week, or at the very least once every two weeks (this is ok if you are providing long-form, high-quality content). This will get the search engines to use to crawl your site often. It will also get your readers use to coming back for more.
In conclusion, starting a blog is actually super simple and it can be done quickly. However, growing your blog can be challenging, but if you are passionate and consistent, you will see great results in due time. Make sure to follow the growth and monetization plan, and someday your blog could be generating and worth a lot of money!
